- Home - Blue Palmetto Home Inspection of Summerville and Charleston
- Learn About Us and This Charleston Home Inspector
- What's Inspected
- Charleston Lowcountry Inspection Areas (geographic)
- Testimonials
- >>>Blogs (educational)
- Sample Reports & Documents
- Why Get a Home Inspection Report
- Charleston's Top Ten Reasons
- Home Inspector Photo Galleries
- Pricing
- Scheduling and Customer Information
- Home Inspection Authorization Contract
- General Scope of Work (electronic)
- Home Inspection Customer Satisfaction Survey
- Privacy Policy
- Full site
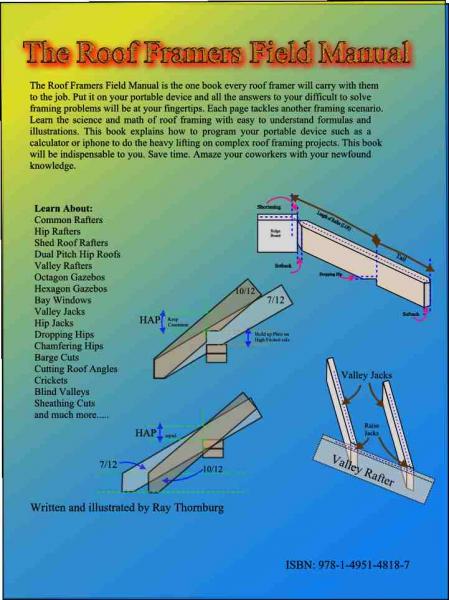
- The Roof Framers Field Manual
How to Lay Out a Hip Rafter explained by a Holly Hill SC Home Inspector
Submitted by Ray Thornburg on Fri, 08/16/2013 - 14:27
How to lay out a Hip Rafter

A hip rafter is laid out just like a common rafter with a few twists.
- We use 17 (16.97) on the square instead of 12.
- The method of shortening at the top is different. (Common rafters are shortened 1/2 the ridge thickness.) (hip rafters are shortened 1/2 the 45 degree angle of the rafter stock)
- The odd unit must be accounted. for.
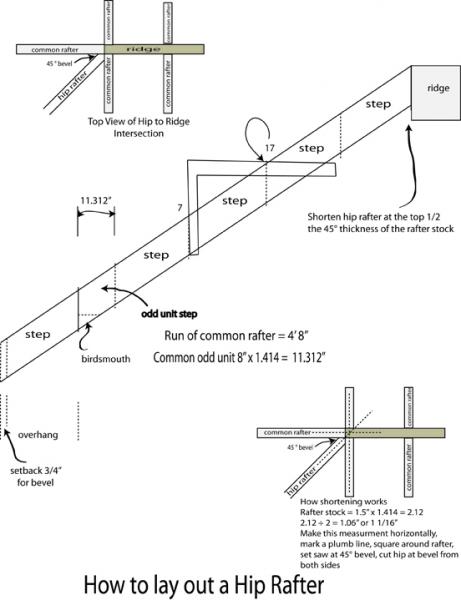
Study the diagram below. Click the image to enlarge into a new window.
The image at left shows a hip rafter with a run of 4' 8" (1/2 the span). Both the common rafter and the hip rafter will have the same run using the layout method. The difference is that we'll use 17 instead of 12 to lay out the hip. This is because hip rafters rise from the corners of the building at a 45 degree angle (diagonal). The diagonal of a square 12" is 16.97 (use 17).
- Draw your plumb cut at the top of your board.
- Turn your square over and "step out" the whole units.
- Figure the odd unit by multiplying it by the square root of 2, (1.414) There is more info on how to do that on my How to lay out the Tail of a Hip rafter Page.
- Draw your birds mouth. See my How to drop a Hip Rafter Page for more info on this.
- Add your overhang. Be sure to set back 3/4" to bevel the tail.
- You must shorten the rafter at the top by 1/2 the 45 degree thickness of the rafter stock. Shortening actually makes the rafter shorter. This is to account for the thickness of the ridge and common rafters. See the diagram above. Also see my Hip Ridge and Wall layout for Hip Roof Page for more info. If your using standard framing lumber 1.5 " thick then the shortening will be 1 1/16". Measure horizontally and make a plumb mark on the rafter.
- Set back at the top 3/4".....draw your line around the rafter on the plumb line and bevel from both sides. Set back does not make the rafter shorter.
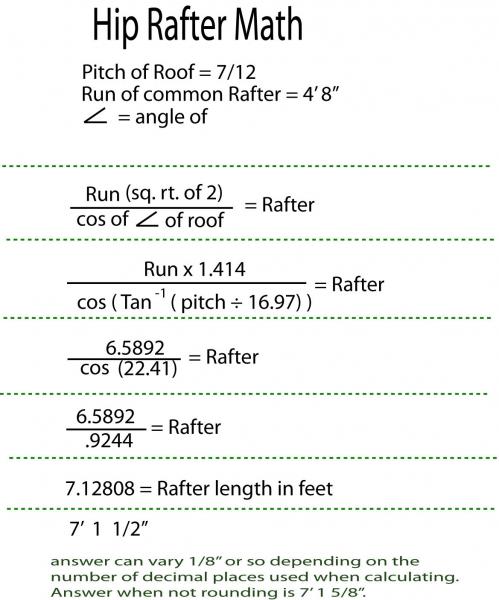
Pictured below is the hip rafter math formula for this. Click the image to enlarge into a new window.
As you can see we have to multiply the run of the common rafter by the sq. rt. of 2 (1.414) to get the run of the hip rafter. The diagonal of a square = the length of one side x sq. rt. of 2. This same formula will work on the common rafter if you omit this step. Using the math method will help prevent cumulative error when laying out long rafters. Just shorten it at the top, cut your setbacks, drop or chamfer and add your tail. It's possible to program your calculator to perform this function quickly, You can even add a subroutine to convert the feet to inches to make it easier if you wish.
To convert feet to inches subtract the integer portion and multiply by 12. For example 7.12808 - 7 = .12808.
.12808 x 12 = 1.54"
1.54 - 1 = .54
.54 x 16 = 8.59 sixteenths of an inch or 1/2"
final answer = 7 foot 1 and 1/2 inches
You should get accustomed to converting tenths of a foot to inches and vise versa if you are going to be a roof framer. You'll be doing it a lot. After a while you'll commit most of it to memory.
See our how to convert pitch to degrees page for more information how to do that.
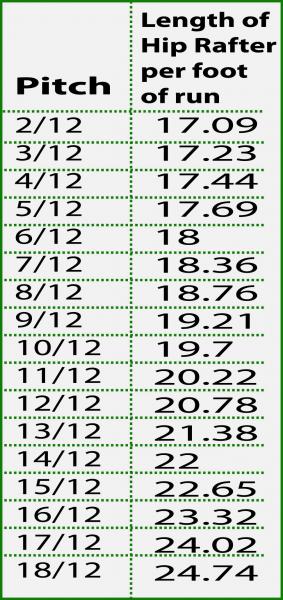
Ok... There is another way to do this...... In case you left your calculator at home. On the side of the framing square. You did remember to bring your framing square.... Right. Anyway most squares have a rafter table and on one line it says "Length of hip rafter per foot run". Simply read across until you find your pitch and multiply that number by the run in feet. Here's a handy Hip Rafter length chart for you.
Click image to enlarge. In the example above the run was 4' 8". Convert inches to feet and you have 8.67'. Find your pitch (7/12) and read across to 18.36.
4.67 x 18.36 = 85.74" or 7' 1 3/4" (slight difference due to how far back you go with the decimal portion).
Then just add your tail, shorten at the ridge cut your setbacks and drop it the proper amount. Easy Pie.
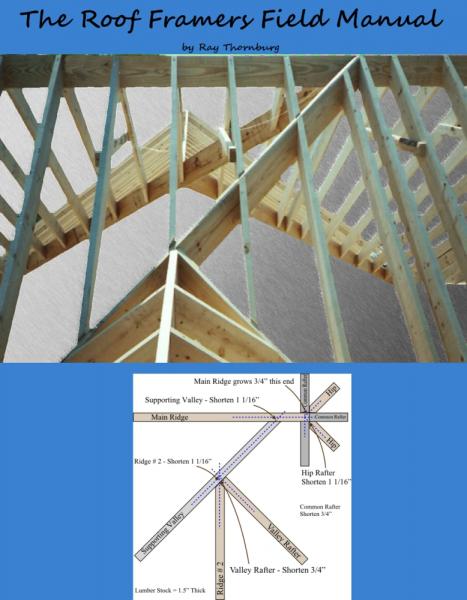
For even more roof framing secrets buy my book! The Roof Framers Field Manual has it all.
Click the links to be taken to our buy it now page!
If you found this information useful leave a comment!
Blue Palmetto Home Inspection serves Holly Hill SC and the surrounding Charleston Lowcountry area.

